TRIKE FRAMES-TABS & TRIANGLES. PART 6
Home / Forum / Pictures / Bikes / Trikes / HotRods
Page 1
Page 2
Page3
Page 4
Page 5
Page 6
Page 7
TRIKE FRAMES-TABS & TRIANGLES. PART 6.

Well, here we are then. Final chapter. I can’t think of anything more to add so let’s close the series with a quick run through the various mounting tabs & strengthening gussets & then I’ll unveil the finished frame. Hey! No cheating & scrolling straight

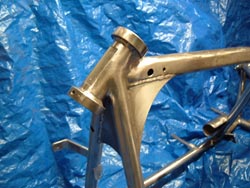
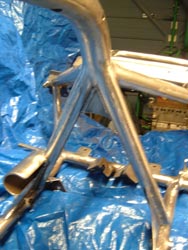
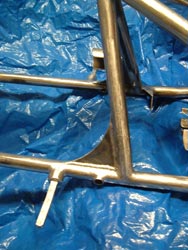
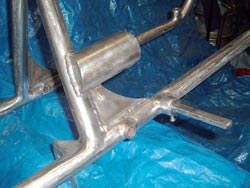
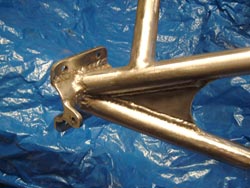
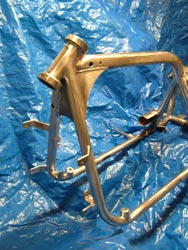
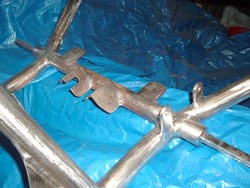
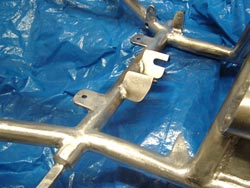
to the bottom! Get back up here! This is for YOUR benefit. I already know all this stuff. I COULD be in the pub you know, or out on me bike, or eating cake with me feet up in front of the telly. Least you can do is read it. That’s better. Now, where was I? O.K, they reckon a photo saves a thousand words & I’ve got a dozen of ’em to use up, so with luck I’ll never have to write anything ever again. -I heard that! Just wait till Karen threatens YOU with a rolled up copy of MCN & forces you to type till your fingers bleed. Right. Pay attention then. Here we go.
 

Here we have the finished headstock. Pretty ain’t it! We were originally going to leave all the frame welds in their natural state but in a moment of madness decided to grind & file them smooth. Never, ever again! Simon spent days working on this bit with a selection of hand files. Trouble is once you start cleaning the welds up you have to do the whole frame or it

looks silly. MIG weld is particularly hard & 3 of us have spent several weeks of afternoons & evenings hunched over this damn frame filing, building up the low spots with more weld, & filing again, being careful not to cut too far in & weakening the joint. Because this frame’s being powder coated we couldn’t use any filler ‘cos it won’t survive the heat of the drying oven, so everything you see is solid metal. We decided we could get away with leaving the straight lines of weld untouched so just cleaned back the joints between tubes.
 

The headstock needs some serious bracing. Not being able to lean a trike like you can a normal bike, this area is subjected to some very strong turning stresses. Better to over engineer than skimp on materials & wish you hadn’t as you’re heading

for the ditch. We’ve used 1/8” steel plate to form a strengthening gusset on each side of the frame with another between the front down tubes. Each one is 4” by 4” . Just to make it look pretty we’ve radiused the exposed edge of the triangles to give the frame a less angular look, & set the gussets along the centre line of the tubes to show off their lines.
 

This photo’s a bit fuzzy, but it’s the only one I’ve got that shows the small triangular gusset beneath the nose of the seat. This obviously helps to brace the junction of several tubes, spreading the load between the two uprights, & also disguises the

sharp angle at the top of these two tubes. On the next frame these uprights will be placed vertically with a bend inwards at the top to meet the top tube. On the left you can see the shroud we added to cover the exposed pinnion gear of the starter motor. Nothing more embarrassing than hitting the ignition & winding your trouser leg into the starter. This is simply a section of 2” diameter tube that sits over the cog with about ½“ of clearance & is welded to the upright where it touches.
 

At the base of the uprights we’ve added more 1/8” thick triangular gussets. These brace them where they lean forward & help to support the top tube. They mirror the radiused headstock giving the engine cradle a more complete, rounded look.

I’ve got a mate with a small lathe in his shed who’s knocked up all sorts of spacers & bits & bobs for these trikes. Hello Reg! Among them are the pivot points for the pedals. These are tubes welded across the bottom frame rails, bored to ½” diameter, with each end machined to take a phosphur bronze bush for the pedals to turn in. A pack of 5 bushes was a quid at last year’s Beaulieu auto jumble. The gussets deliberately extend over these pivots to brace the bottom rails where they’ve been bored. YOU bored yet? No? O.K, next.
 
The opposite side of the frame, showing the starter motor pinnion shroud. Below the footpeg you can see an M6 bolt. We drilled & tapped the underside of each peg to take a bolt that will act as a stop for the pedals, preventing them from clanging
against our nice shiny coated frame. With a bolt & lock nut we’ll have some adjustment on the pedal height. Behind the upright you can just see the mounting bracket for the Girling brake master cylinder. All three brakes will be linked together on one pedal, removing the need for a lever on the handlebars. The braided stainless brake hoses will run inside the bottom frame rails, while the bulk of the wiring loom will be routed through the top tube.
 
The last gussets are at the pointy end of the hardtail. These obviously add some strength to the first point of contact for the
vibrations caused by running without rear suspension, & also look kinda nice I think! Nice big welds around those axle clamps. Notice the small locating tabs on the clamps. These bolt to corresponding tabs on the axle itself to stop it from turning in the clamp or sliding sideways. Go on, admit it, we’re cleverer than you thought we were!
 
Alright. That’s all the strengthening gussets covered. Back to the front again -?
Here’s a fuller picture of the engine cradle. In the bottom bearing cup of the headstock we’ve drilled & tapped an M8 thread to take the shiny stainless steel steering stop that Reg made for us. This is basically a sleeve around an M8 allen bolt
& corresponds to two more fitted to the bottom yoke. Being stainless they don’t need painting so won’t get chipped when the forks are dropped onto full lock. We’ve allowed roughly 45 degrees of turn in each direction. Of course, with the Reliant engine we’ve also got reverse gear, which makes 3 point turns a whole lot easier. You can also see the VIN plate mount on the headstock, a wiring loom hole & tank mount in the top tube, a brake hose hole in the down tube, mounts for the Mini radiator ahead of the down tubes & tabs for the Suzuki Intruder electric radiator fan between them. Further down are the front engine mounts & beyond that the starter motor shroud again. All make sense? Good.
 
These are the gearbox mounts. Like the front turrets, we don’t bother with rubber mounts here. Don’t seem to need ’em. In the foreground are the tabs for the Metro handbrake lever. Regulations state this must be situated so as to be accessible by the rider while seated. Makes sense really but I’ve seen plenty of trikes with levers tucked away on the back axle. We use modified VW Golf cables to hook up to the rear calipers. The handbrake must also be a “separate mechanical system”, which counts out the hydraulic line-locks I’ve seen on some machines, & must operate on all the wheels on any axle. That means a pin that locks the front brake lever in place would do, although technically that would be operating the existing hydraulic braking circuit I suppose. The Golf/Passat calipers we use have a dual operated piston.mount. It sits on a screw
thread & under normal braking the whole assembly is moved by hydraulic fluid, then when the handbrake’s used the piston is mechanically screwed out to lock on the brakes. Nice & tidy.
The large tabs behind the gearbox cross member are the lower mounts for the battery box. Haven’t made this yet but we’ve still got the cardboard mock-up we made for Darren’s which seems to fit. The box has removable sides & is a horseshoe shape to sit over the propshaft with the battery on the right & the rest of the ‘leccy gubbins on the left. The exhaust silencer also hangs from one of these tabs, with the tail pipe hung on a couple of bolts welded to the back of the number plate.
Same thing. Other side.
 

Here you can see the seat frame & the top battery box mounts. These are made from 1/8” thick, 2” wide flat steel strap. The handbrake, radiator & fan tabs are 1” wide.


Wanna see the completed frame now?
Well sorry, but I’m going to keep you in suspense just a little longer. -Ha Harr!!
Got just enough photos left to spin it out for one last chapter, so watch this space!