Cant do much today,so thought I would do a detail of my shifter,which may be of help to someone.so here it is courtesy of Jodys comp wizardry........
RODS build........
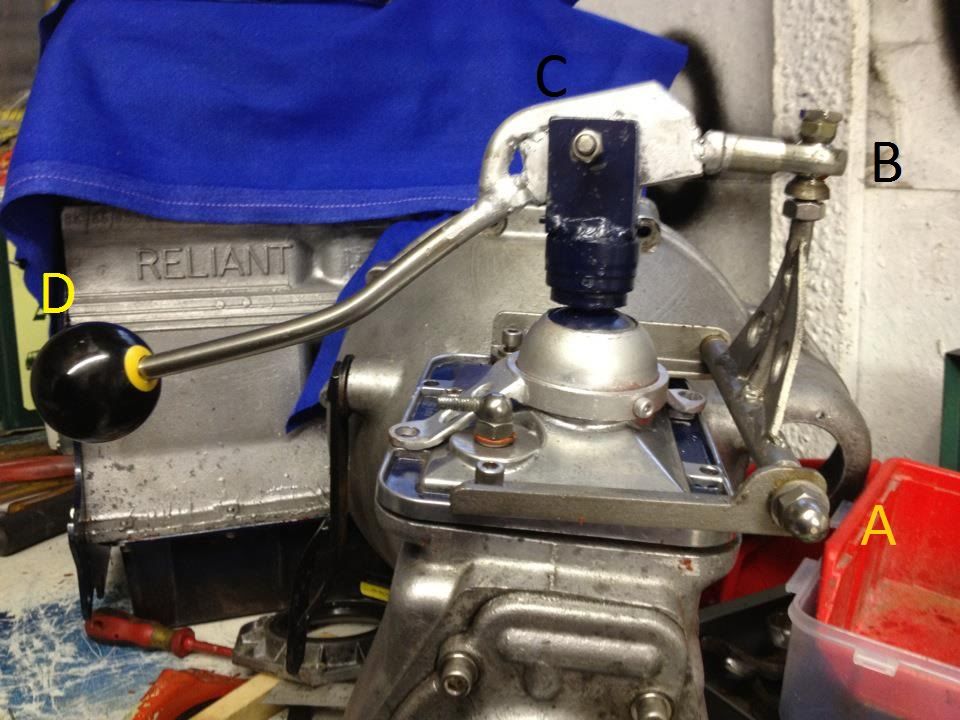
A TO B = 3 7/8"
B TO C = 3"
C TO D= 10"
I tapered the top of some 8mm nuts to allow the rod end to travel as far as I dare.(joint B)
Pivot at A has bronze bushes. to accept 8mm bar that runs through a piece of tube that fits losely over the bar.
the 'pin' pivot at C is a piece of 6mm stainless rod threaded both ends.
I found the orig. g/lever was slightly bent as it came out of the ball and cup,so I straightened as best I could,then brazed a sleeve over,(about 1" long) it to up the diam.and straighten it .
Then I machined a lump of bar to accept a bronze bush that fits the g/lever stub.
I drilled the end of the g/lever to accept a 5mm(I think) bolt,which sits in the base of the fork at C. This allows the 'fork' to rotate ,but not come off the g/lever stub.
the g/lever is mounted on a lump of 1/2" block,that is a tight fit into the fork.
I had to juggle the g/lever length and the way it is fixed to this block so that it clears my frame.
I did find that there was a lot of strain on the spring clip holding the ball/cup in ,hence I built the stronger mounting for it.
Most of the components are as I first did them for the prototype. It worked so well firsttime,that I just beefed everything up with weld etc,so some of it doesnt look too fancy!In the rides Ive had so far it has been very positive gearchanging. I've got another orig g/lever that Im going to modify into a basic dogleg,as a quick replacement just in case this one breaks1


