|
minimutly
|
 |
« Reply #285 on: October 24, 2016, 10:40:15 PM » |
|
Lol, sorry, just come in after some polishing of the stainless bumper, along with the one end cap - looks OK for an old pinto valve. sorry, didn't take any pics. I'll take a couple tomorrow.
It's all very well recycling some ancient stainless, until you start polishing it and realise how badly marked it is. (The tube came from some scrap back in my dairy days, were used as table legs in our bedgord cf camper, at least 30 years ago. There's something satisfying about it though?
|
|
|
|
|
 Logged
|
|
|
|
|
minimutly
|
|
« Reply #286 on: October 26, 2016, 06:38:08 PM » |
|
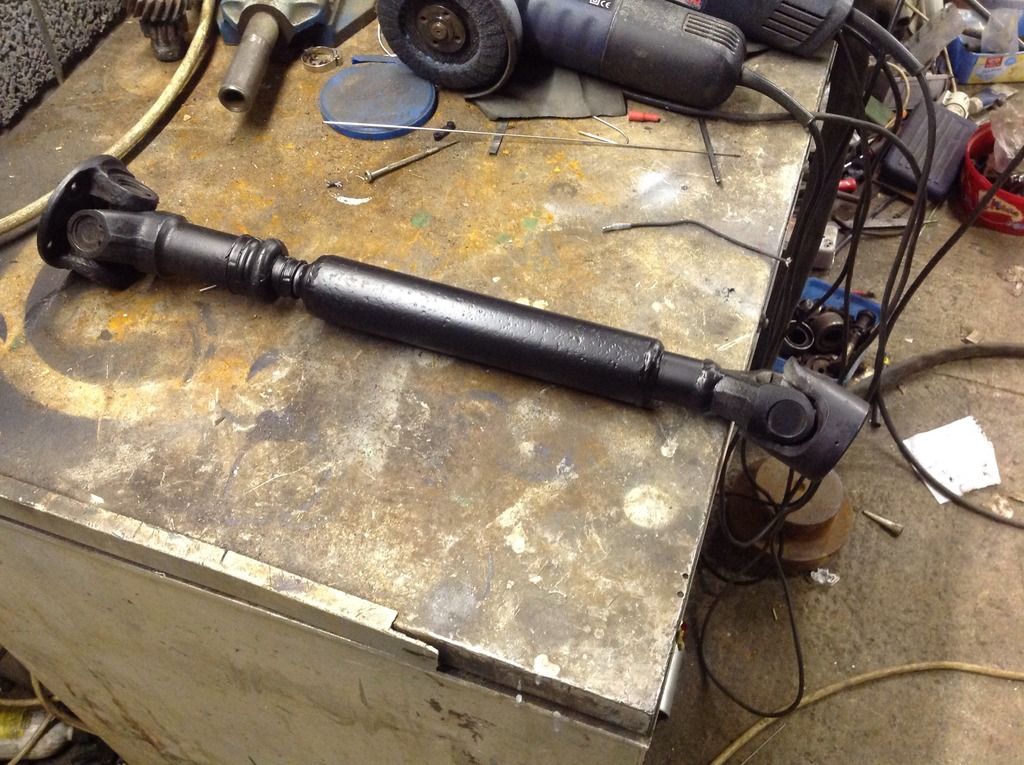 Kawasaki 750 hard tail (was rear end ratios) the propshaft, mk2. There might be a mk3 if I can be bothered. 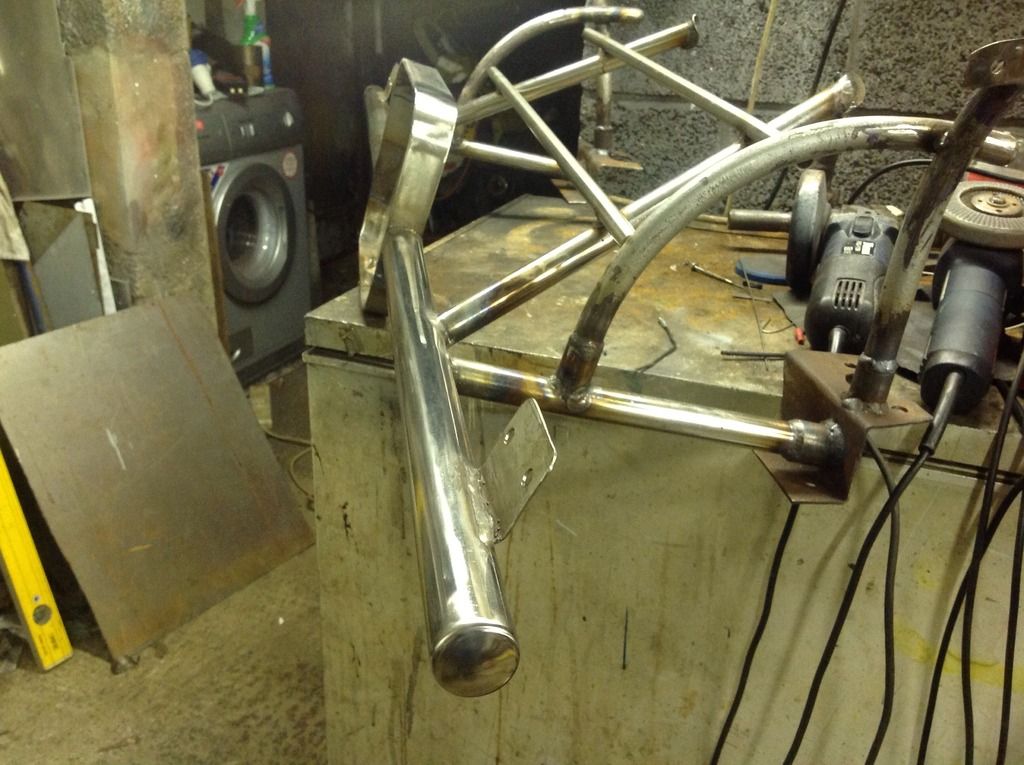 Kawasaki 750 hard tail (was rear end ratios) and here is the end of the rear bumper, would you believe a stainless Ford Pinto exhaust valve? |
|
|
|
« Last Edit: April 17, 2017, 07:34:53 AM by minimutly »
|
Logged
|
|
|
|
|
minimutly
|
|
« Reply #287 on: October 26, 2016, 06:43:11 PM » |
|
Hopefully tonight will get to forming the radius and polishing up the other end. Need to order some sheathing to run the rear lights in, found some 3mm and 6mm in carbuildersolutions. Then make up a torque reaction bar for the diff. Slow progress at the moment, shame with the weather being so nice.
|
|
|
|
|
Logged
|
|
|
|
Manky Monkey
Administrator
Hero Member

Karma: 264
Posts: 55102

|
|
« Reply #288 on: October 26, 2016, 08:13:28 PM » |
|
You've been a busy bunny.
|
|
|
|
|
Logged
|
On the last freedom moped out of Nowhere City.
|
|
|
|
minimutly
|
|
« Reply #289 on: October 31, 2016, 09:30:12 PM » |
|
Not a very busy bunny this weekend, Abergavenny with the rugby on Sat, not much shape yesterday, grandkids, trick or treat etc tonight. Hopefully get back to it tomorrow night.
|
|
|
|
|
Logged
|
|
|
|
|
minimutly
|
|
« Reply #290 on: November 05, 2016, 10:18:16 PM » |
|
Prop fitted, back end polishing not quite finished, I spun up the rear wheels tonight to check various bits'n pieces and found my back wheels are buckled, bent and the tyres are flat spotted.
Looks like I need to take them off to correct as best I can. Poo
|
|
|
|
|
Logged
|
|
|
|
|
Olds
|
|
« Reply #291 on: November 06, 2016, 08:45:54 AM » |
|
Are you sure it's the wheels and not how they are mounted or the hubs not being true. As for the tyres, they may just need warming up. Pump them up to the max pressure and leave them in a warm room (or cupboard with a fan heater). It's a good idea to check how old they are. Tyre wear on the back of a trike is minimal and they may be well out of date before they wear out.
|
|
|
|
« Last Edit: November 06, 2016, 08:48:43 AM by Olds »
|
Logged
|
Getting older but no wiser! Just using bigger hammers.
The answer to most problems, fire and lots of it.
|
|
|
Manky Monkey
Administrator
Hero Member
Karma: 264
Posts: 55102
|
|
« Reply #292 on: November 06, 2016, 09:34:02 AM » |
|
Yup, I've had the "buckled wheel" problem before & as Dave says, turned out to be just that the wheel wasn't sitting flat against the hub. A thin shim fixed it. Your local tyre depot can spin them on their balancing machine & tell you for certain.
|
|
|
|
|
Logged
|
On the last freedom moped out of Nowhere City.
|
|
|
|
minimutly
|
|
« Reply #293 on: November 06, 2016, 10:19:10 AM » |
|
Are you sure it's the wheels and not how they are mounted or the hubs not being true. As for the tyres, they may just need warming up. Pump them up to the max pressure and leave them in a warm room (or cupboard with a fan heater). It's a good idea to check how old they are. Tyre wear on the back of a trike is minimal and they may be well out of date before they wear out.
Good suggestions, but it didn't take a genius to try another wheel (actually took two to find a perfect one) without tyres to check the hubs were spot on. And yes one, probably both tyres are flat bottomed, they were bought new just over a year ago but the trike has been sat on them, I'll take your advise on that olds. The "skewed" wheel can be corrected by machining the mounting flange, probably in my miller, the bent inside of the other one is potentially more serious, but i'll tackle that one first, just in case it has to go in the bin... |
|
|
|
|
Logged
|
|
|
|
|
minimutly
|
|
« Reply #294 on: November 08, 2016, 06:26:34 PM » |
|
I have drawn up a "wheel corrector" if my sketching was anything like Mr Olds I would take a pic and load it. Anyway the contraption is essentially a scaffold tube with a rear hub spigot welded on, with a hole bored at 90 degrees to allow a threaded rod of substantial proportions to be used to push out against the inside of the wheel. It even allows for an opposite side tube and nut to stabilize the wheel if needed.
The question is though, what sort of heat, if any should be used to aid this correction? I realise this is dicing with death in a way, but cast aluminium generally shows its displeasure clearly if pushed too hard, anfd these are scrap anyway if I dont improve them.
|
|
|
|
|
Logged
|
|
|
|
|
minimutly
|
|
« Reply #295 on: November 18, 2016, 11:05:43 PM » |
|
Wheels left for now, been getting on with wiring rear lights, found another bodge with the ignition switch - I couldnt get anything on "park". It turned out a british ignition switch had been fitted, which doesnt work on an American bike. Also found, eventually the live feed had been connected to one of the outputs, now all good except i have to have hazards and indicators available all the time.
One question, will I need a fog light for msva?
Thanks,
Huw
Had a look at the sticky in this section, good info. It seems my lack of sidelight in the headlamp isnt an issue, i dont need a foglight, and the hazards will be fine. I have fitted a high level brake lightnot sure if this is a issue.
|
|
|
|
« Last Edit: November 18, 2016, 11:32:12 PM by minimutly »
|
Logged
|
|
|
|
|
minimutly
|
|
« Reply #296 on: December 29, 2016, 11:23:44 AM » |
|
Not been much progress recently, however yesterday I made these:  Kawasaki 750 hard tail (was rear end ratios) Now fitted to the open rack end tubes, blasted the mountings and put some primer on, will be black by end of today hopefully. Trike slept outside last night for the first time, hope its not too upset.. Oh, blwyddyn newydd dda (happy new year to you all). Huw |
|
|
|
« Last Edit: December 29, 2016, 11:26:25 AM by minimutly »
|
Logged
|
|
|
|
Manky Monkey
Administrator
Hero Member
Karma: 264
Posts: 55102
|
|
« Reply #297 on: December 29, 2016, 02:19:32 PM » |
|
Them's nice.
|
|
|
|
|
Logged
|
On the last freedom moped out of Nowhere City.
|
|
|
stinkey
Hero Member

Karma: 93
Posts: 2757
I can't stop building stuff ?,but I'm slowing down
|
|
« Reply #298 on: December 29, 2016, 06:26:05 PM » |
|
Not been much progress recently, however yesterday I made these: Kawasaki 750 hard tail (was rear end ratios) Now fitted to the open rack end tubes, blasted the mountings and put some primer on, will be black by end of today hopefully. Trike slept outside last night for the first time, hope its not too upset.. Oh, blwyddyn newydd dda (happy new year to you all). Huw Shiny holes ..cool  |
|
|
|
|
Logged
|
Backyard hotrodder,learnt by mistake,still learning ?
|
|
|
|
minimutly
|
|
« Reply #299 on: December 29, 2016, 09:24:48 PM » |
|
I did toy with bacdrilling them for lightness, but it would have likely marked the outside.I guess if I'd made a holder for them so I could produce the radius last, and made them the other way it would have worked, but anyway its not the end of the world. 2 coats of gloss black 2pack on the mudguard brackets today, looks OK. Need to make a torque reaction bracket tomorrow and tlhenassemble everything, and if the weathers nice take it for a test drive. Only 3 years since I started  |
|
|
|
|
Logged
|
|
|
|
|


