|
Clive
|
 |
« Reply #30 on: November 16, 2009, 08:15:34 PM » |
|
About eighteen months now buddy! I can use water-based, or solvents, but tend towards water-based (be it paints or pens) for th majority of the work. Obviously lacquers are either acrylic 1K (Halford-y type stuff), or Solvent 2K clears like the stuff used on my Vespa and Chopper!
|
|
|
|
|
 Logged
|
|
|
|
|
gazzagood
|
|
« Reply #31 on: November 16, 2009, 08:33:10 PM » |
|
that's brilliant mate wish i could do some thing like that
|
|
|
|
|
Logged
|
I always know what I'm doing. Can you help me
PLEASE
|
|
|
|
Clive
|
|
« Reply #32 on: November 20, 2009, 02:53:35 PM » |
|
Part 5. Finally got some time to get the other side of the helmet done!  Helmet paint how to.... Then once that was treated to a coat of 'top coat', I decided whereabouts the portrait work was going to go  Helmet paint how to.... And masked off a rectangle (that isn't actually rectangular because of the helmet curves), and then using liquid latex (  ) masked off the part of the dragon that'll end up on top of the picture. This protects the artwork below, and then just peels off afterwards, great for intricate designs on curved surfaces!  Helmet paint how to.... Finally turned the whole square white with Etac Titanium white paint!!  Helmet paint how to.... That's it for today, off to pick up my kids from Bristol now!! |
|
|
|
« Last Edit: November 20, 2009, 02:55:29 PM by Clive »
|
Logged
|
|
|
|
smallhog
Jr. Member

Karma: 6
Posts: 40
|
|
« Reply #33 on: November 21, 2009, 03:44:28 PM » |
|
WOW! Really brilliant!  Can't wait to see the finished article  |
|
|
|
|
Logged
|
|
|
|
|
ROD
|
|
« Reply #34 on: November 21, 2009, 05:37:06 PM » |
|
You clever git! |
|
|
|
|
Logged
|
|
|
|
|
voodoo
|
|
« Reply #35 on: November 21, 2009, 08:42:47 PM » |
|
Looking good...Voodoo....
|
|
|
|
|
Logged
|
Custom Paint Spraying...
English by Birth..Biker by choice....
Growing old is inevitable...Growing up is optional....
|
|
|
VALLEYSBOY
Hero Member
Karma: 24
Posts: 1965
sheep shagger
|
|
« Reply #36 on: November 21, 2009, 09:30:20 PM » |
|
like it lots m8 |
|
|
|
|
Logged
|
More metal than skin
|
|
|
|
Clive
|
|
« Reply #37 on: November 22, 2009, 03:37:35 PM » |
|
Part 6. On the white area, I sketched lightly the main area's of the picture  Helmet paint how to.... Then, with transparent Smoke, added in the background details, not worrying too much about tight lines as it's out of focus on the pic anyhow. The eyes were just boredom kicking in!!  Helmet paint how to.... Once I was happy with the background, I masked that off using 'ultramask', a kind of clear low tack fablon, and started on the detail! Tight detail is really hard at that small scale, so some compromises were made!  Helmet paint how to.... Once it's un-masked, and the latex covering the overlap removed, I added a gentle drop shadow underneath the the picture.  Helmet paint how to.... And my new logo added!  Helmet paint how to.... The it was the first layer of clearcoat. This isn't smooth, but the next few after sand and clearcoat will improve that.  Helmet paint how to....  Helmet paint how to....  Helmet paint how to....  Helmet paint how to.... It does start to show up the pearl yellow though!!  Helmet paint how to.... That's it for at least two days now. As the clear needs to harden nicely. Clive PS, If nothing else you could read this if you're having trouble sleeping. It'll send you right off!!! |
|
|
|
|
Logged
|
|
|
|
|
gazzagood
|
|
« Reply #38 on: November 22, 2009, 08:58:23 PM » |
|
that's great... Clive.can't..wait part 7 . how long did it take to create the portrait. in all the stages.did you airbrush it or use pens.if you don't mind me asking.and what grade paper you use to flat clear coat.Gaza
|
|
|
|
|
Logged
|
I always know what I'm doing. Can you help me
PLEASE
|
|
|
|
Clive
|
|
« Reply #39 on: November 22, 2009, 09:23:53 PM » |
|
Portrait is all airbrushed buddy, in about two hours!!!
As for flatting the clear, I personally start with 2400 (micromesh), then 3200, before using Farecla G3 then G10 compounds, and then a good dose of turtle wax polish! But I'm sure somwone like Voodoo will do it differently! To be honest, I'm never happy with my finishing, so will be looking for someone local to do the clearcoat and polish on my work from now on!!!
Clive
|
|
|
|
« Last Edit: November 23, 2009, 07:18:56 AM by Clive »
|
Logged
|
|
|
|
|
voodoo
|
|
« Reply #40 on: November 23, 2009, 12:43:24 PM » |
|
Nothing wrong with your polishing tech Clive,a lot finer for airbrushing than normal paintwork thats for sure,but also a lot finer finish needed for artwork I bet...But do you polish by hand or have you got one of the small polishing mops?....Just curious as I like to know if I am the only plonker likes sitting there for 3 or 4 hours compounding and polishing small stuff by hand lol...I look forward to seeing some more of this stuff....Voodoo....
|
|
|
|
|
Logged
|
Custom Paint Spraying...
English by Birth..Biker by choice....
Growing old is inevitable...Growing up is optional....
|
|
|
|
Clive
|
|
« Reply #41 on: November 23, 2009, 05:17:00 PM » |
|
I've got a small hand mop (a 12v one), but will have to end up doing it by hand to get the finish I want!!!
The finishing technique is exactly the same for this as normal paintwork buddy, it all gets clearcoated in the same way!
Clive
|
|
|
|
|
Logged
|
|
|
|
|
Clive
|
|
« Reply #42 on: November 29, 2009, 02:56:33 PM » |
|
I haven't forgotten about this thread!! The clearcoat used on this, has taken forever to harden, but looks awesome!! It's just been sanded back with 3200 micromesh, and is back in the airing cupboard to dry, and allow any solvents left that were re-activated with the sanding evaporate. The clear is also in there as well. As soon as I get an hour or two in daylight during the week then it'll get the final layer of clear, and looks like it might not even need sanding and polishing!!!!! I haven't been slacking though, I managed to get these finished! Not exactly custom paint, but great fun to do, and I have three more to do now for paying customers!!! Clive  Helmet paint how to.... 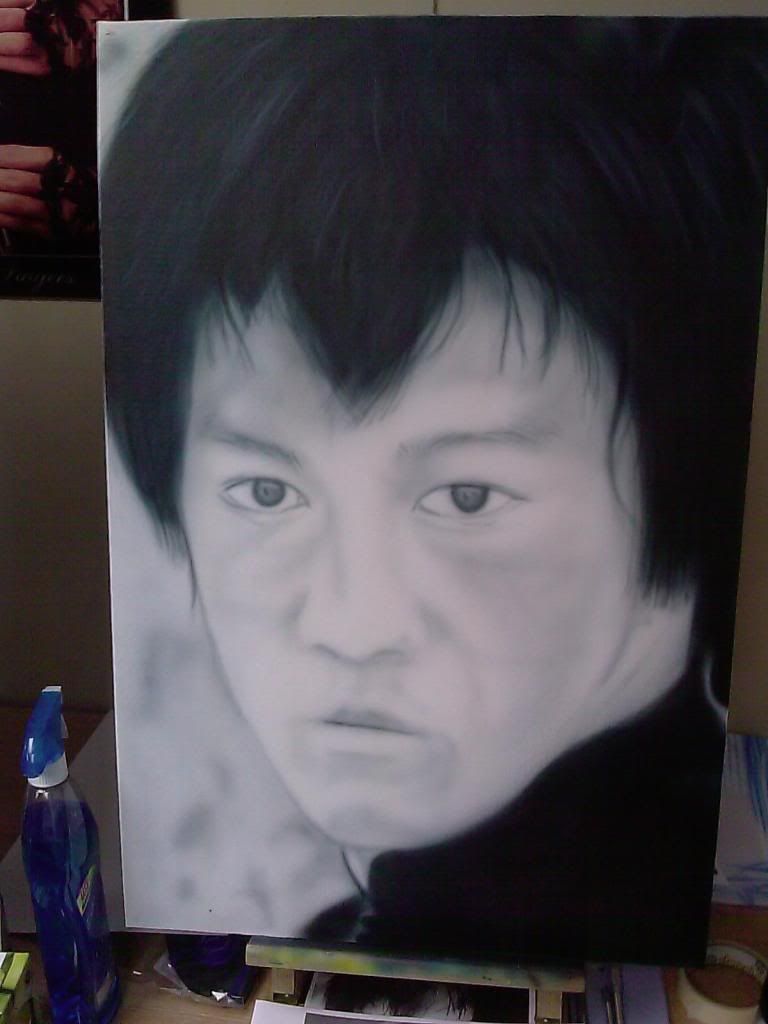 Helmet paint how to.... 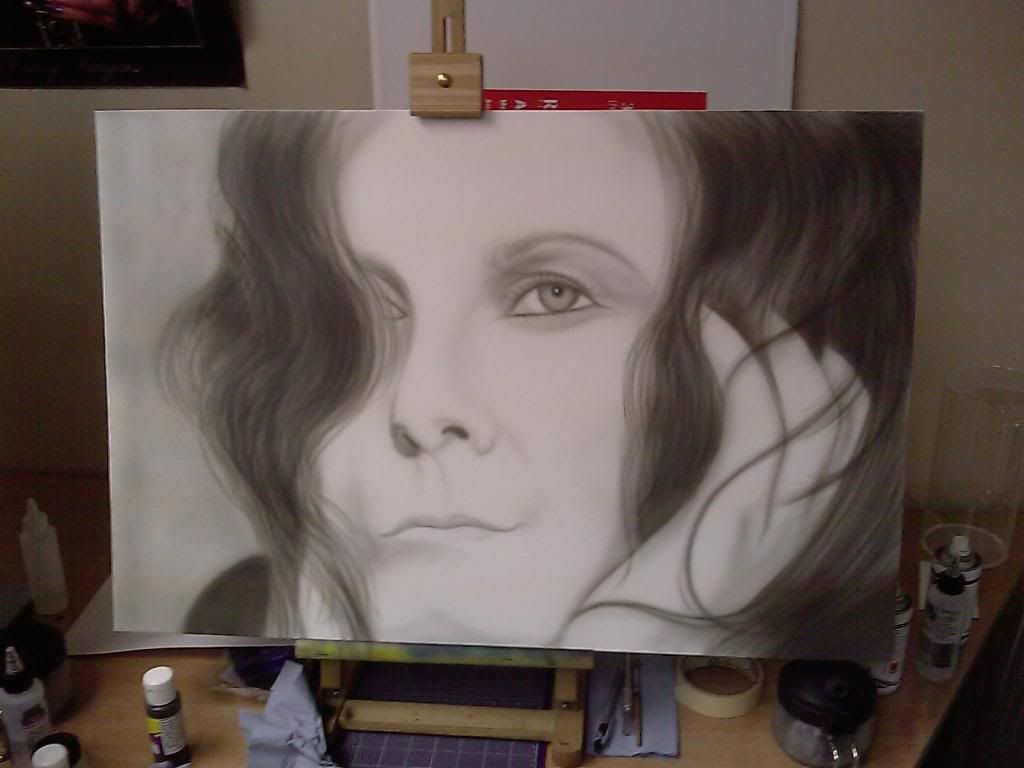 Helmet paint how to.... 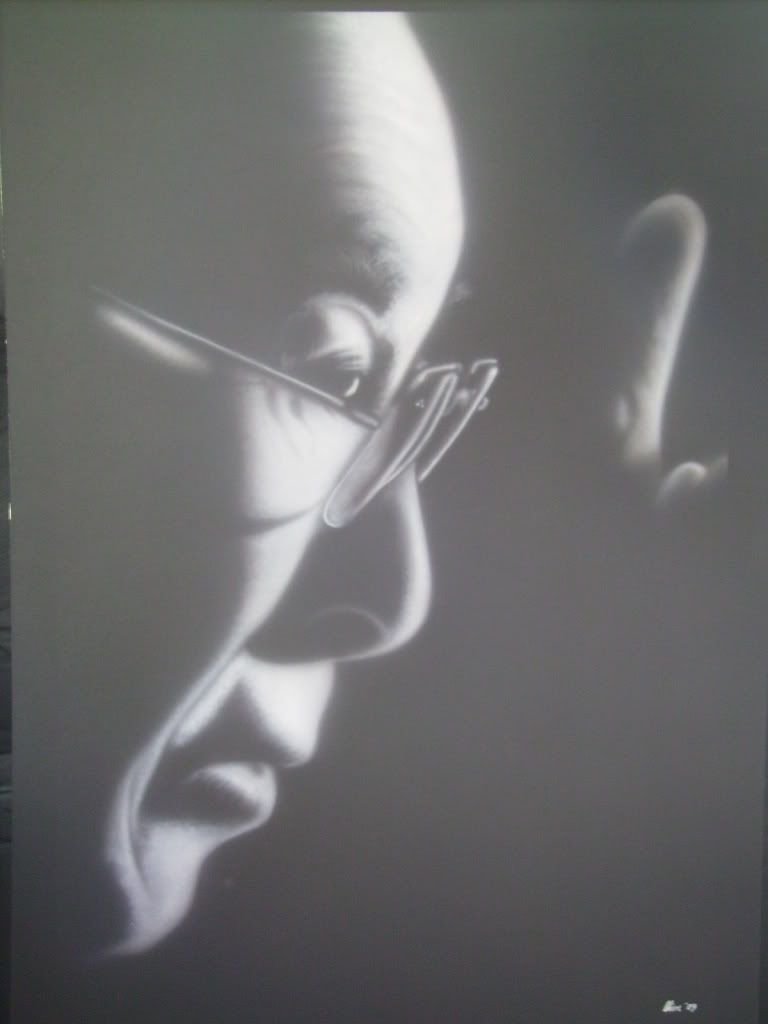 Helmet paint how to.... |
|
|
|
|
Logged
|
|
|
|
Manky Monkey
Administrator
Hero Member

Karma: 264
Posts: 55102

|
|
« Reply #43 on: November 29, 2009, 05:46:49 PM » |
|
That last portrait's fantastic Clive.
|
|
|
|
|
Logged
|
On the last freedom moped out of Nowhere City.
|
|
|
|
Clive
|
|
« Reply #44 on: November 29, 2009, 07:28:27 PM » |
|
Cheers buddy! Finished it today, and REALLY pleased how it came out. Two and a half hours well spent!!!
Got more portrait work to do for customers as well! A dog portrait, a single,and a family portrait! They're great to do, but I do love the custom stuff!!!!!!!
Clive
|
|
|
|
« Last Edit: November 29, 2009, 08:18:03 PM by Clive »
|
Logged
|
|
|
|
|


