|
fifer
|
 |
« Reply #90 on: March 25, 2014, 10:29:25 PM » |
|
Aha , someone is not a photobucket virgin  . Looking forward to the rest of this post as a pic explains a thousand words . |
|
|
|
|
 Logged
|
Confucious ; He say that man who take woman up hill , him not on level
|
|
|
|
minimutly
|
|
« Reply #91 on: April 07, 2014, 07:42:15 PM » |
|
Aw poo, cocked up photobucket again.
Must try harder,
huw
|
|
|
|
|
Logged
|
|
|
|
|
minimutly
|
|
« Reply #92 on: April 07, 2014, 07:46:28 PM » |
|
 Kawasaki 750 hard tail (was rear end ratios) |
|
|
|
|
Logged
|
|
|
|
|
minimutly
|
|
« Reply #93 on: April 07, 2014, 07:51:33 PM » |
|
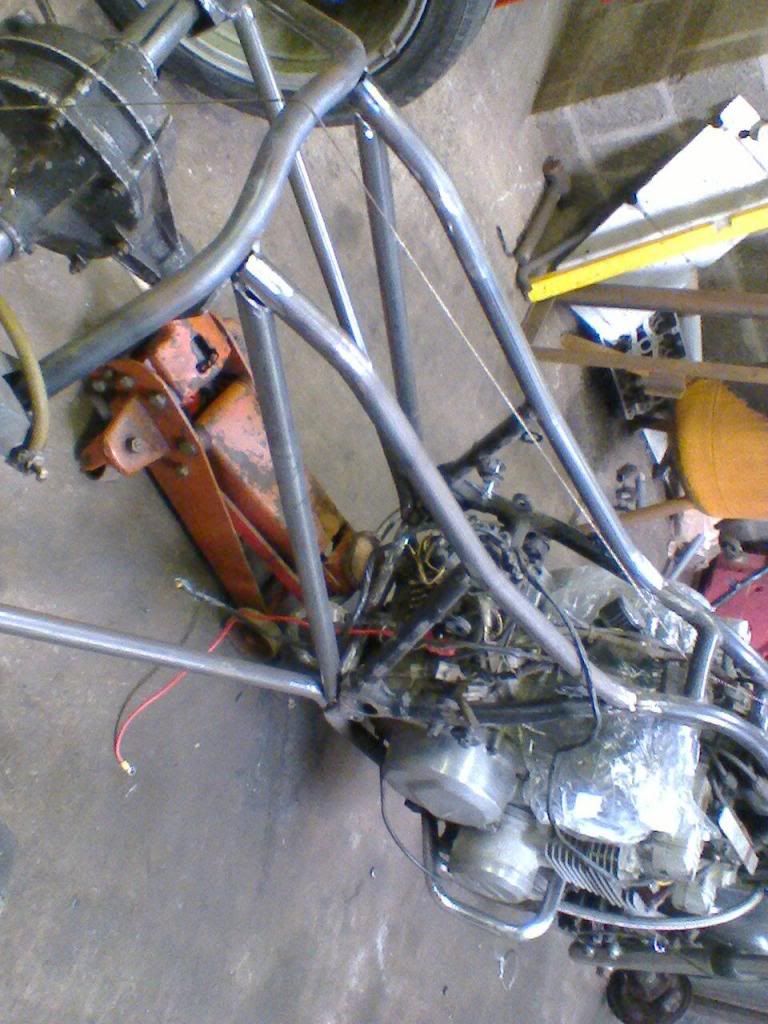
Frame coming together slowly.. 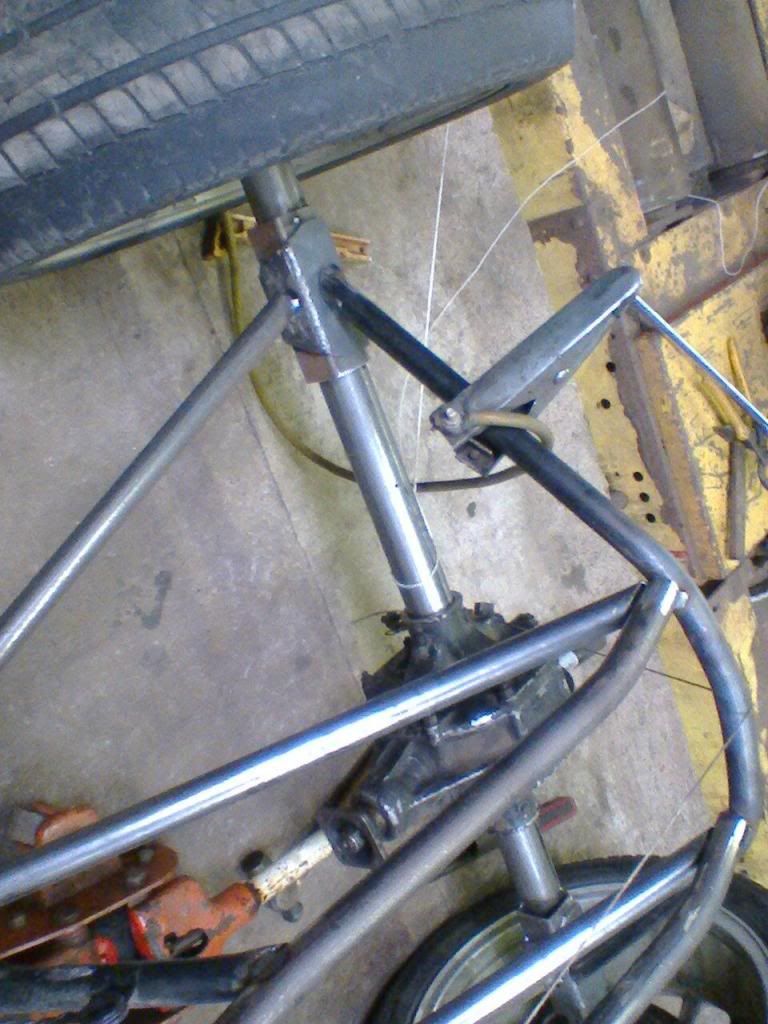 Kawasaki 750 hard tail (was rear end ratios) New seat rails made, the diagonals in to the bottom of the frame, and the lateral bars back to the axle. Almost ready for propshaft.. 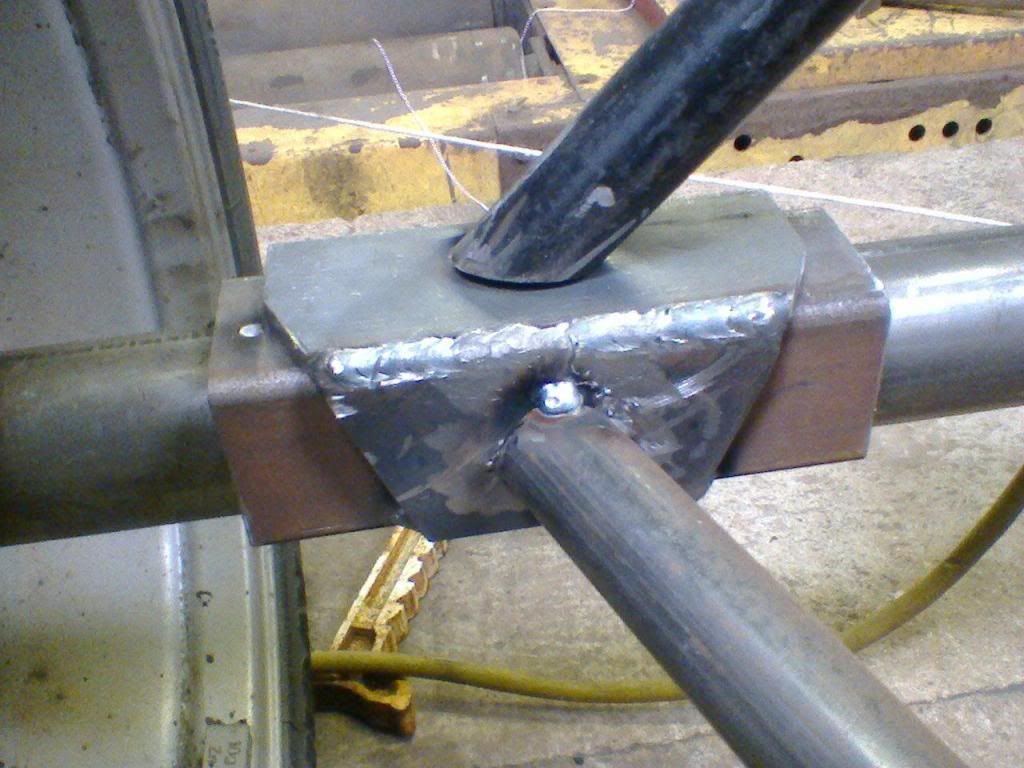 Kawasaki 750 hard tail (was rear end ratios) Huw |
|
|
|
|
Logged
|
|
|
|
|
minimutly
|
|
« Reply #94 on: April 07, 2014, 07:54:29 PM » |
|
That last pic's been squashed by photobucket, the bracket is wide enough for two M10 bolts top and front.
All the best,
Huw
|
|
|
|
|
Logged
|
|
|
|
|
minimutly
|
|
« Reply #95 on: April 07, 2014, 08:15:16 PM » |
|
I made the mistake of tacking the axle brackets rather than drilling them, this meant i now have to remove them after lining everything else up.
Quick question, does anyone add a degree or so to the "lean in " to allow for the road camber most usually seen on our roads, given most driving will be on the left side of A or B roads?
Need to finish the axle brackets asap so I can get on with the brake pedal/linkage/master cylinder. Then seat brackets, reweld the tank brackets, mudguards, and 4 into 1 exhaust. Loads to do.
All the best,
Huw
|
|
|
|
|
Logged
|
|
|
|
|
Olds
|
|
« Reply #96 on: April 07, 2014, 08:34:43 PM » |
|
Quick question, does anyone add a degree or so to the "lean in " to allow for the road camber most usually seen on our roads, given most driving will be on the left side of A or B roads?
Not that I've ever heard of. Build it straight and perpendicular. It's not a sidecar outfit. |
|
|
|
|
Logged
|
Getting older but no wiser! Just using bigger hammers.
The answer to most problems, fire and lots of it.
|
|
|
|
minimutly
|
|
« Reply #97 on: April 22, 2014, 11:17:03 PM » |
|
Some progress to report. The outside of the frame is welded (but not the triangulation - I wanted to check for distortion first), brackets for the axle drilled and welded to the frame. I'm in the process of making up a new brake mcylinder/linkage, the old one stuck out orizontally under the frame and generally looked poo. The new one is a vertical one off a mini (cooper S actually, the only spare mini one I had), I've rebuilt it with a seal kit and am making a frame to mount it and the original brake pedal/lever together. (is it a pedal or lever on a mcycle?). It will be hidden up inside the frame so hopefully much better.
Anyway this is taking absolutely ages, but it's in one piece, I had to make a new actuator rod since the original was too short, the return spring is fitted, and tomorrow night so will the brake light switch. Then I need to make some mountings and bolt it up, run the hoses and test it. Given it's all mini, and the distance from fulcrum to actuator rod is similar, as is the pedal length, I'm expecting a fairly short throw and brakes that'll lock on command. Famous last words, probably end up with a long pedal and little braking...
I was planning to make a new rear "bumper" out of some stainless pipe I had from my time in the dairy industry (they were the legs on the table on our Bedford cf camper actually). Went to look for them tonight, and after having them lying around for 15 years at least, I have a faint recollection of telling myself "throw them in that scrap, you'll never use them". So bo****ks, no stainless bumper.
All the best,
Huw
|
|
|
|
|
Logged
|
|
|
|
BikerGran
Hero Member

Karma: 94
Posts: 10604
Gran Turismo
|
|
« Reply #98 on: April 23, 2014, 08:50:24 AM » |
|
That's what stops us all getting rid of all the rubbish, sorry treasures, lying unused in garage or attic for years. Of course if you don't throw it out you will never, ever need it for anything!
|
|
|
|
|
Logged
|
You don't stop havin fun because you get old - you get old if you stop havin fun!
|
|
|
|
the coppersmith
|
|
« Reply #99 on: April 23, 2014, 09:23:53 AM » |
|
I have a Moskivich ( look it up) oil filter on my shelf, been there since 1972. Alongside a 2 1/2" galvanised pipe nipple, why I dont know  |
|
|
|
|
Logged
|
|
|
|
|
minimutly
|
|
« Reply #100 on: May 11, 2014, 10:21:09 PM » |
|
Aha, found the stainless pipe, I'd stuck it in the grill opening of the old cooper. The shame is two bits aren't long enough, I'll have to put something in the middle or weld 3 together.
Progress (slow) to date:-
Have today finished the K/Q seat mountings - swivels, seat lock and and landing pads. I knew it would be a pain but quite frankly I regret not making my own seat from scratch.I had to take the cover and sponge off the pan to repair the rust, as well as fit the aforesaid mountings. I've also just about finished the brake master cylinder pedal box, but I suspect It'll have a clash with the 4 into 1 exhaust I bought on ebay last week, wee'll see when it arrives!
Now that the master cylinder lives where the batter box used to, I've had to turn it 90degrees, making new brackets etc, cables all seem to reach.
Also set about the drive shaft, used a mini cv joint (not for the cv part) to make an adapter between the Kawi UJ and reliant prop. Tomorrow night I'll clock it up on the lathe before tacking it up.
So there is progress, and truth be told I'm getting itchy wanting to try it out, but it's still likely a week or three away.
Cheers,
Huw
|
|
|
|
|
Logged
|
|
|
|
|
minimutly
|
|
« Reply #101 on: May 12, 2014, 10:31:44 PM » |
|
Spent tonight making up the propshaft, and I may have made a mistake. The original prop didn't have a slider, which was a bit of a cockup if you think the axle was welded into the frame! But, I figured, since the new axle is bolted in, a solid prop would be fine. The problem is now I'm not so sure, it needs to be held in quite closely, and if it's slack it can move around and out of line quite a bit. The original end had a locating pin - the haynes manual isn't clear whether this is spring loaded. My question is, what do other kawasaki gt/z 550/650/750 owners use - a sliding joint with locking pin or wedged in shaft?
If it needs to use the original locking pin (which I'll have to make cos i don't have one), I'll have to lop the back end off the shaft and fit a mini driveshaft spline and hardy spicer (which I believe some relliants had originally).
Please let me know what you think?
Regards,
Huw
|
|
|
|
|
Logged
|
|
|
|
BikerGran
Hero Member
Karma: 94
Posts: 10604
Gran Turismo
|
|
« Reply #102 on: May 13, 2014, 07:48:39 PM » |
|
My GT550 trike uses the orginal swingarm from the bike - which of course contains the bike propshaft. This is cut and joined to the propshaft stub from the Reliant axle. I guess there is some sort of slider in the bike propshaft end? Some pics here which may help..... http://s195.photobucket.com/user/BikerGran_photos/library/GT550%20Trike%20conversion?sort=4&page=1 |
|
|
|
|
Logged
|
You don't stop havin fun because you get old - you get old if you stop havin fun!
|
|
|
|
minimutly
|
|
« Reply #103 on: May 14, 2014, 03:06:02 PM » |
|
mmm, very interesting, you have no swivel at the diff end at all, and no slider since this was at the back. I wonder if the locating pin has been removed?
Did you sell her BG?
Thanks for replying by the way.
Huw
|
|
|
|
|
Logged
|
|
|
|
|
terry t
|
|
« Reply #104 on: May 14, 2014, 03:43:54 PM » |
|
|
|
|
|
|
Logged
|
|
|
|
|


