stinkey
Hero Member

Karma: 93
Posts: 2757
I can't stop building stuff ?,but I'm slowing down
|
 |
« Reply #15 on: June 20, 2016, 10:22:46 PM » |
|
Just make sure your top angle tube is pushing against that top tube and not below it as in your pic ? If possible ?
|
|
|
|
|
 Logged
|
Backyard hotrodder,learnt by mistake,still learning ?
|
|
|
mrhutch
Jr. Member
Karma: 4
Posts: 67
|
|
« Reply #16 on: June 20, 2016, 10:31:22 PM » |
|
I'd want a little more "angle on the dangle" for the 20mm tube  That's not far off the angle it'll be to be honest. Any massive dramas with it you can see? I'm sure it'll be fine, I'd just like it a bit more perpendicular to move the forces along the length of the tube instead of trying to bend it. |
|
|
|
|
Logged
|
|
|
|
|
Clive
|
|
« Reply #17 on: June 20, 2016, 10:34:29 PM » |
|
Just make sure your top angle tube is pushing against that top tube and not below it as in your pic ? If possible ?
 ? Here's my plan 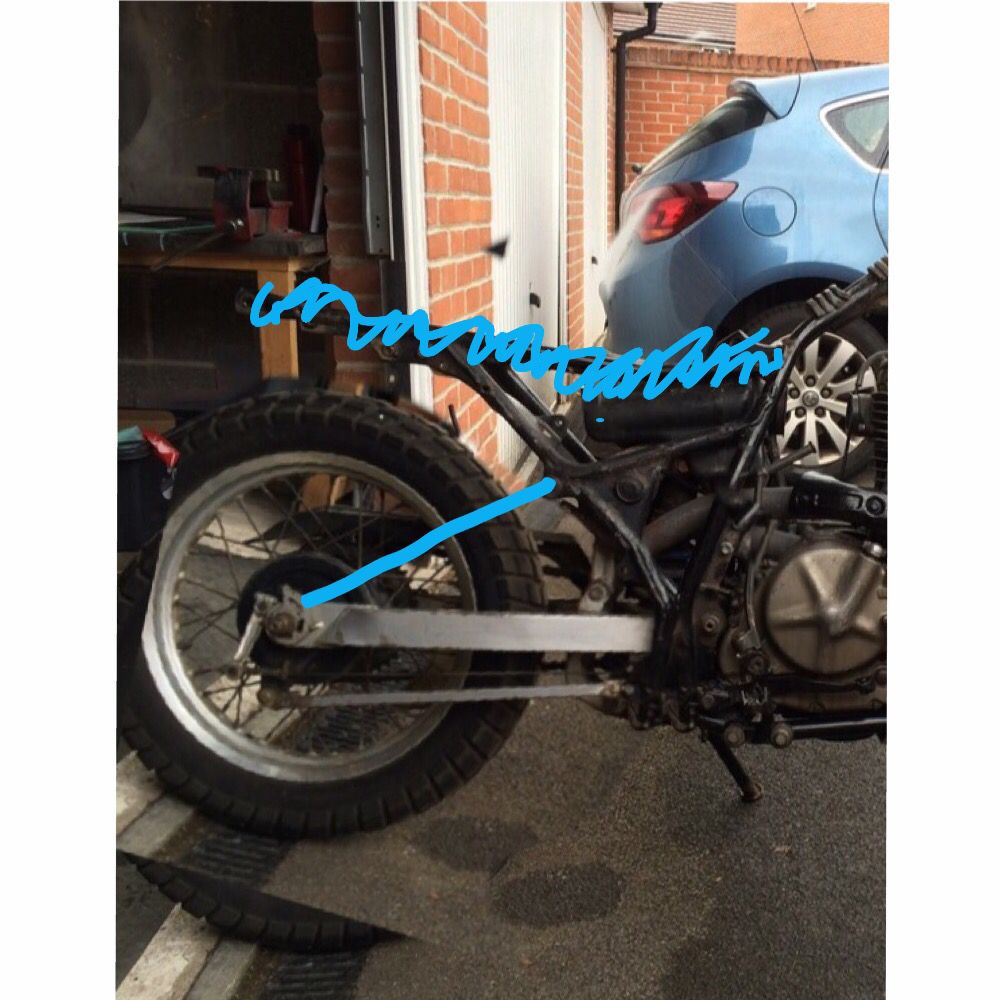 Green-Go (was called Clive's Latest) |
|
|
|
|
Logged
|
|
|
|
|
Olds
|
|
« Reply #18 on: June 21, 2016, 06:21:20 AM » |
|
You mentioned shortening the forks or raking the front. Are you planning on leaving the arse end high ?
Lowering the rear, about 2.5" - 3" would align the 'hardtail' tube with the existing frame tube.
|
|
|
|
|
Logged
|
Getting older but no wiser! Just using bigger hammers.
The answer to most problems, fire and lots of it.
|
|
|
|
Clive
|
|
« Reply #19 on: June 21, 2016, 06:45:19 AM » |
|
Nope. If you have a squint at the pic above (with the scribbles on it), I will be lowering the the rear until the swingarm is parallel to both the bottom of the frame, and the floor, for exactly the reason you stated, for 'flow'............... That pic has already been manipulated, so the drop if you look at the one in the first post, is more like ten inches  |
|
|
|
« Last Edit: June 21, 2016, 06:47:13 AM by Clive »
|
Logged
|
|
|
|
|
Olds
|
|
« Reply #20 on: June 21, 2016, 07:06:06 AM » |
|
Ah yes. see it now.  |
|
|
|
|
Logged
|
Getting older but no wiser! Just using bigger hammers.
The answer to most problems, fire and lots of it.
|
|
|
stinkey
Hero Member
Karma: 93
Posts: 2757
I can't stop building stuff ?,but I'm slowing down
|
|
« Reply #21 on: June 21, 2016, 07:48:12 AM » |
|
You can lower it more if you like ? Are you still keeping the drop seat ? If you do it will make for a more comfy ride ?
|
|
|
|
|
Logged
|
Backyard hotrodder,learnt by mistake,still learning ?
|
|
|
|
Clive
|
|
« Reply #22 on: June 21, 2016, 07:59:37 AM » |
|
Fitting a sprung solo seat, so the scribbles are the bits being removed. The drop will, hopefully, keep the lines looking 'right' if you know what I mean.
|
|
|
|
|
Logged
|
|
|
|
|
Clive
|
|
« Reply #23 on: June 21, 2016, 01:46:57 PM » |
|
Got it sitting about right: 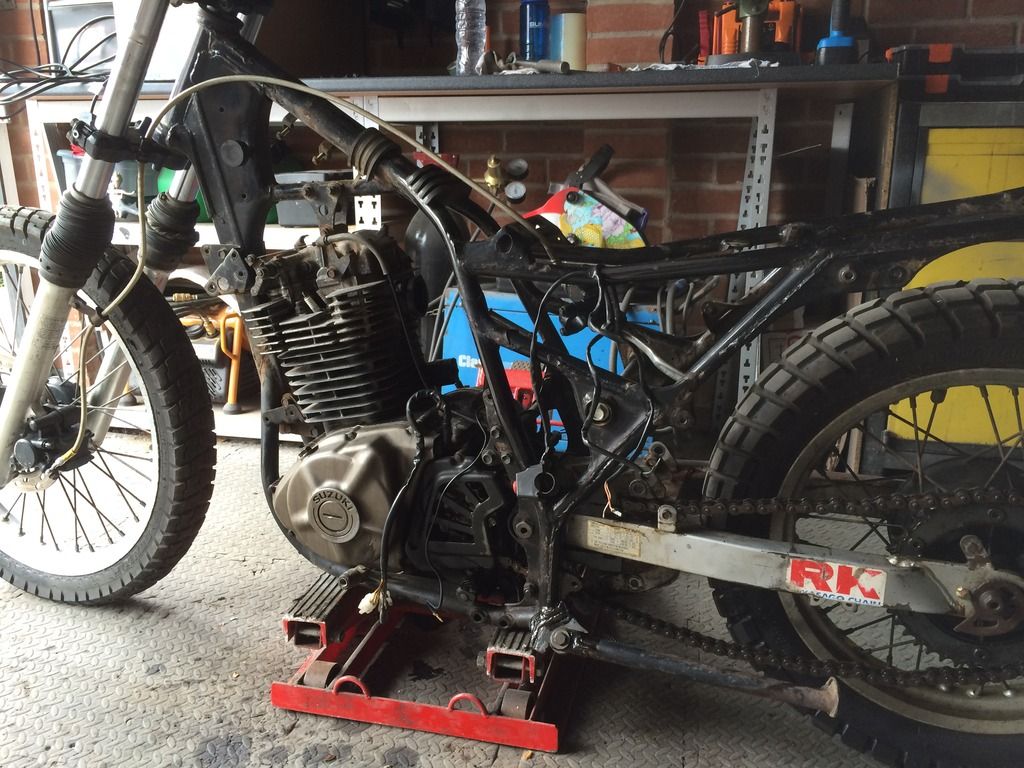 Green-Go (was called Clive's Latest) Think I'll get away with the stock headstock, but will have to lose 12cm off the forks: 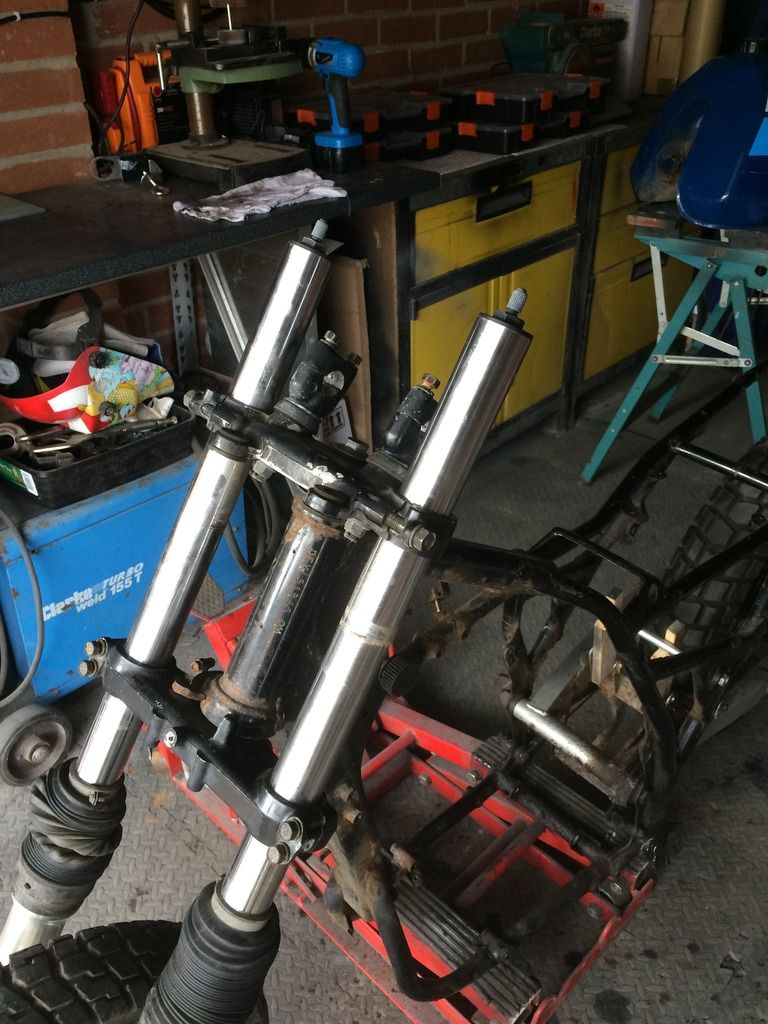 Green-Go (was called Clive's Latest) If I shorten the forks by about 40mm again, like the XL, and use clip ons it 'should' give me the look I'm after |
|
|
|
|
Logged
|
|
|
|
|
Clive
|
|
« Reply #24 on: June 23, 2016, 08:04:42 PM » |
|
Does anyone know what the flywheel and clutch covers are treated with/covered in, as some has rubbed off and I'd like to re-do it?
Or will it be easier to maybe get them polished? Anyone know of anywhere to get them done if so?
|
|
|
|
|
Logged
|
|
|
|
|
Clive
|
|
« Reply #25 on: June 24, 2016, 03:07:26 PM » |
|
Got the first fork shortened today. 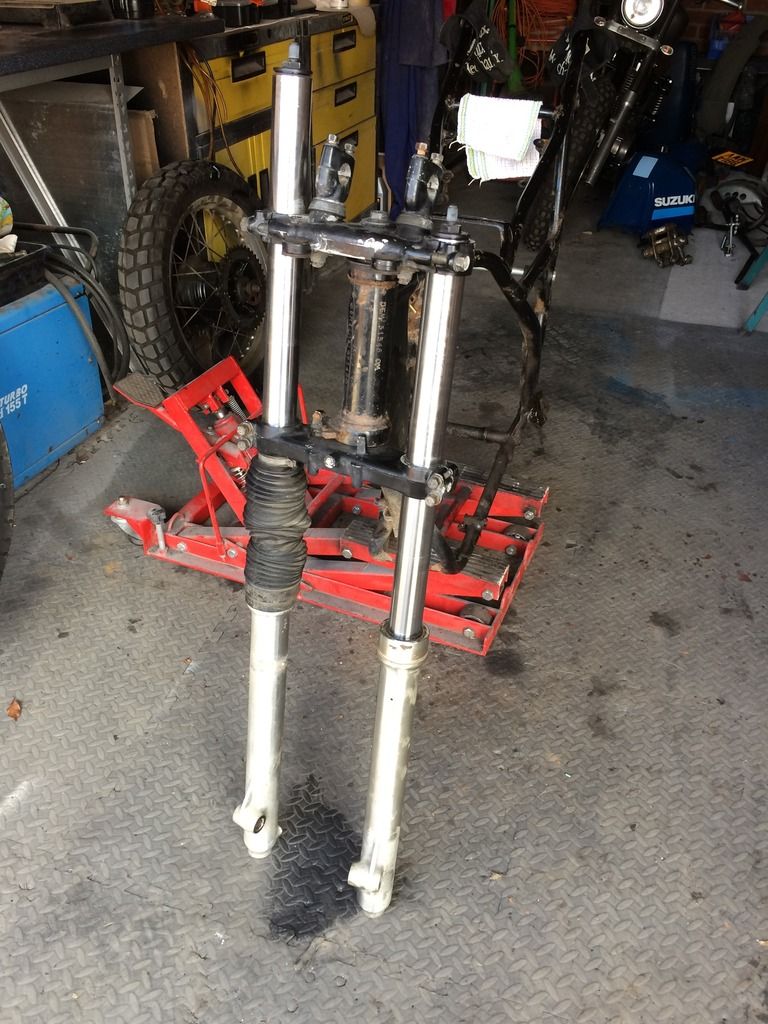 Green-Go (was called Clive's Latest) If anyone's interested in how it was achieved, I'll take some pics as I go along, on the other one. |
|
|
|
|
Logged
|
|
|
|
mrhutch
Jr. Member
Karma: 4
Posts: 67
|
|
« Reply #26 on: June 24, 2016, 03:48:56 PM » |
|
^^^ YES
|
|
|
|
|
Logged
|
|
|
|
|
merv
|
|
« Reply #27 on: June 24, 2016, 05:40:10 PM » |
|
Seeing i'm not the first, oh go on then |
|
|
|
« Last Edit: June 24, 2016, 05:44:22 PM by merv »
|
Logged
|
Why do every five minute job take all day, and
if it can go wrong it will go wrong
|
|
|
|
Clive
|
|
« Reply #28 on: June 25, 2016, 01:23:22 PM » |
|
So, I did the other one today like this: Take off the top fork nut, remembering it's under Spring tension from below, and then take out the spacer: 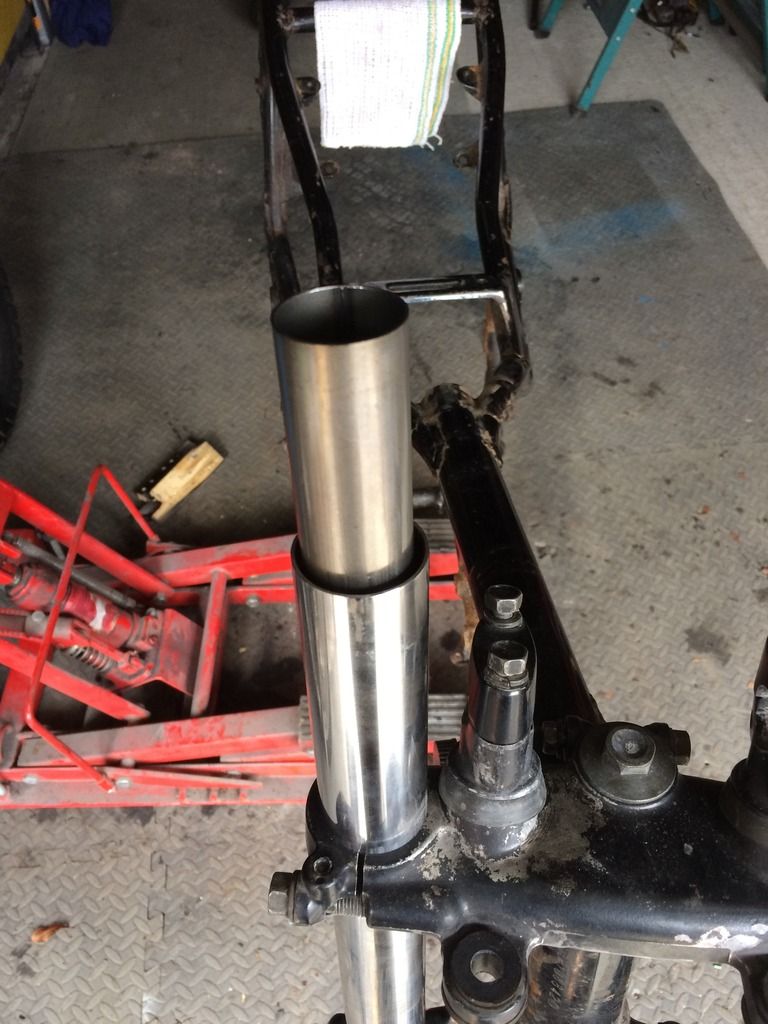 Green-Go (was called Clive's Latest) These are all different lengths depending on the forks, and aren't even consistent across 'types' of bike. The XL I did last year had a 40mm spacer, this one a 150mm spacer. Take the spring, and the little collared washer that sits on top of it out slowly, remembering that it will be covered in oil, and then remove the leg from the triple tree and drain the oil, remembering to pump the forks to drain the oil from below the inner tube as well. Some forks have a drain point at the bottom of the fork leg, so use that before removing from the triple trees. 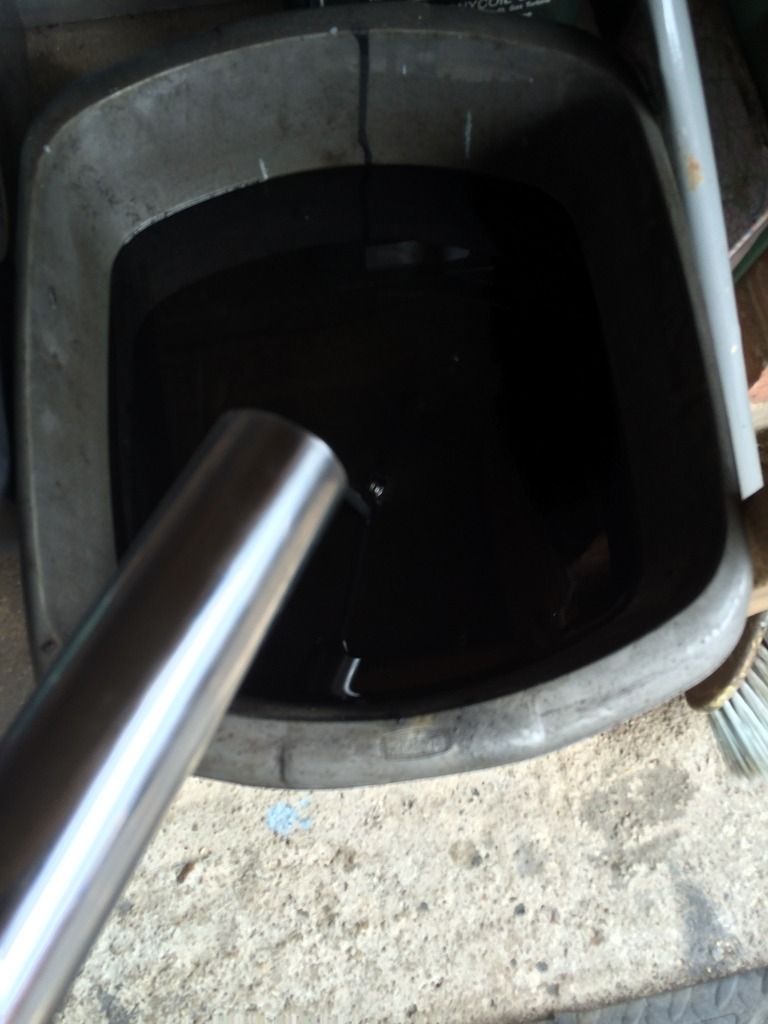 Green-Go (was called Clive's Latest) Now the piston needs removing from inside the tube. Each manufacturer sells a removal tool that looks like a big nut at the end of a 'T' handle. I've seen people make their own as well, but I've always found a universal fit one is...............a wooden broom handle. It just needs a little trimming into a hex shape and then some not-so gentle persuasion into the piston. This then prevents the piston from turning, as you undo the Allen bolt at the bottom of the fork leg. 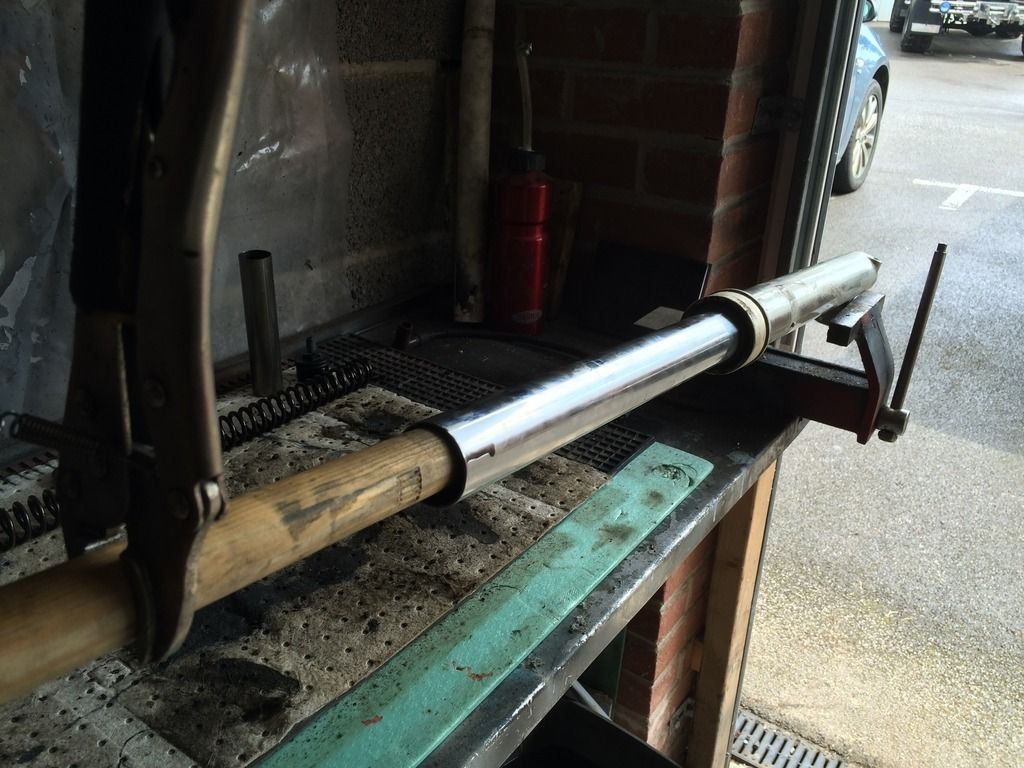 Green-Go (was called Clive's Latest) And voila, the piston is out, along with the little spring that it sits in. 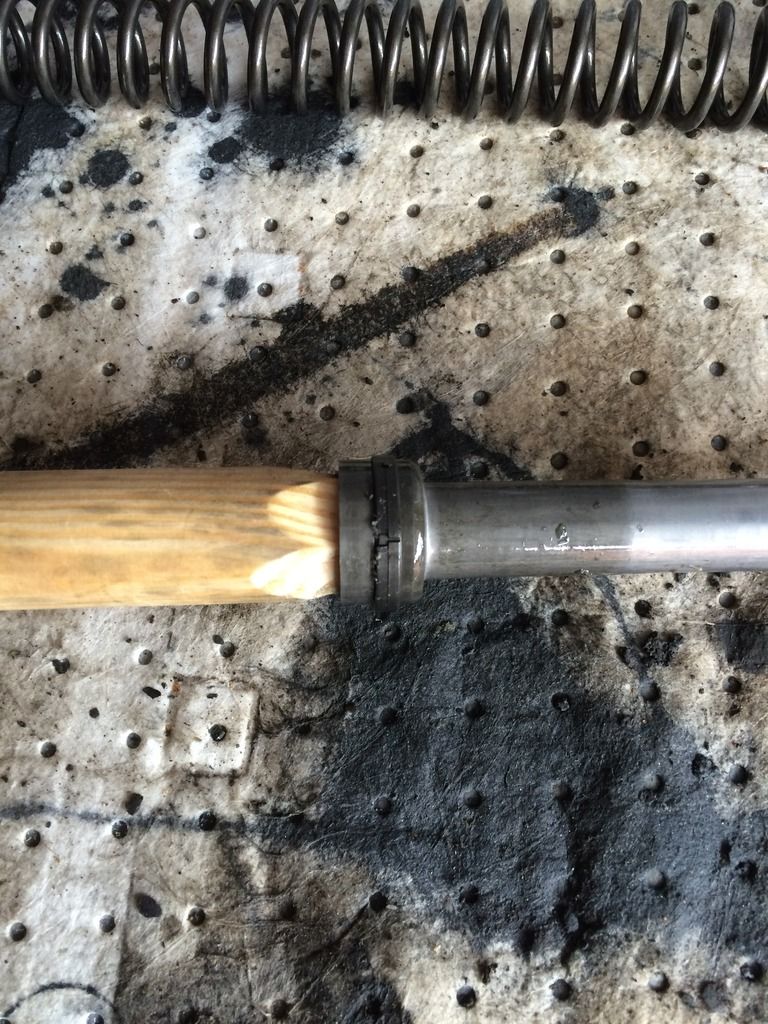 Green-Go (was called Clive's Latest) |
|
|
|
« Last Edit: June 25, 2016, 02:56:38 PM by Clive »
|
Logged
|
|
|
|
|
Clive
|
|
« Reply #29 on: June 25, 2016, 01:33:26 PM » |
|
Here's the internals laid out, pre adjustment: 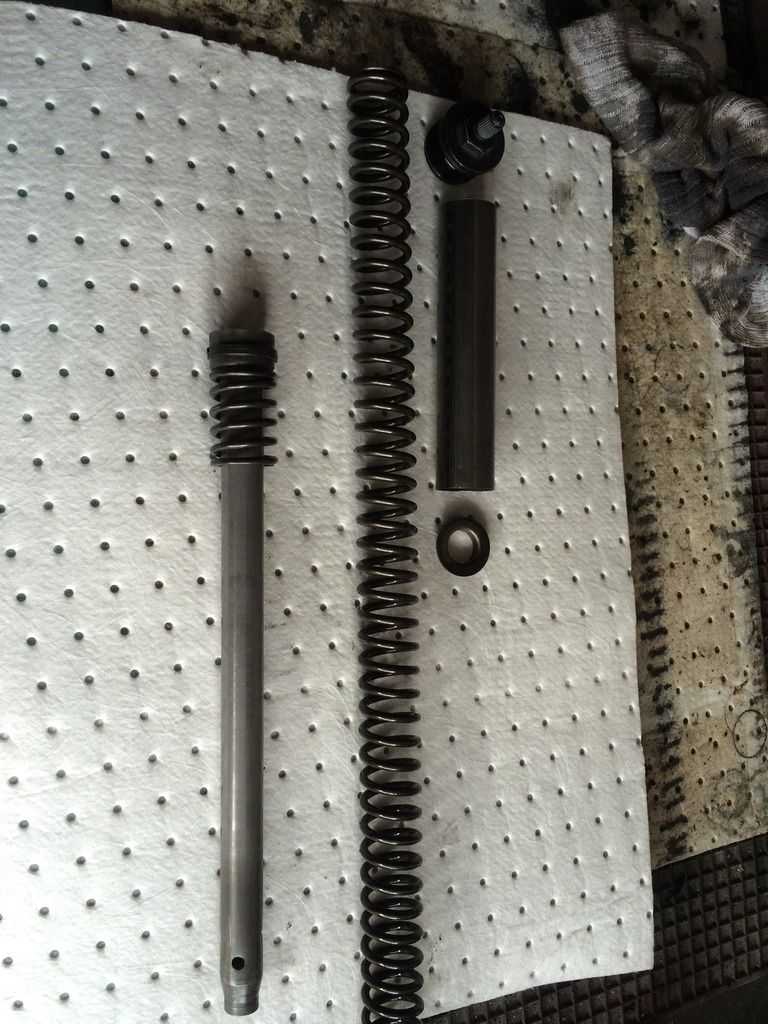 Green-Go (was called Clive's Latest) The trick to shortening the forks, is however much you take from the top (in this case 120mm), has to be added to the bottom, between the piston 'head' and the little return Spring. Luckily in this case, the spacer at the top was long enough to cut, and the spacer was a spot on match for the piston head and Spring, so it was just a case of trimming 120mm off the spacer, and moving that 'down'. When I did the XL, the spacer was only 40mm long, but wouldn't fit lower down, so the good Mr Hunter kindly machined me a couple of spacers for the piston. After cutting, pre-assembly. 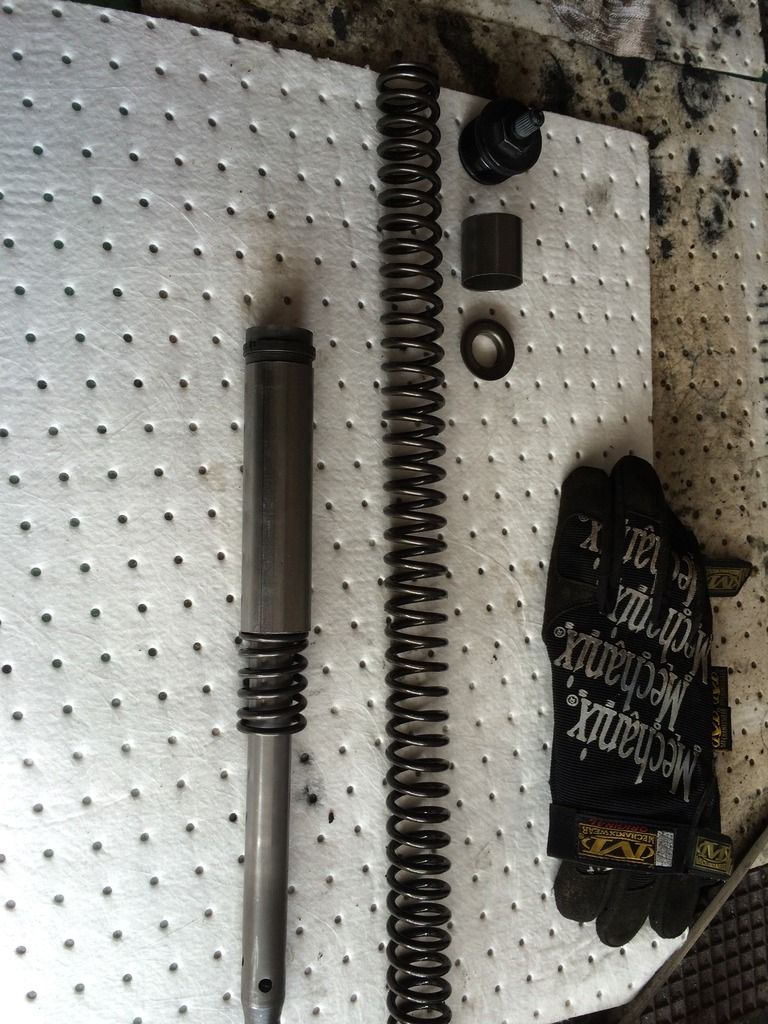 Green-Go (was called Clive's Latest) After that, it's just a case of re-assembling it, and re-filling with oil. 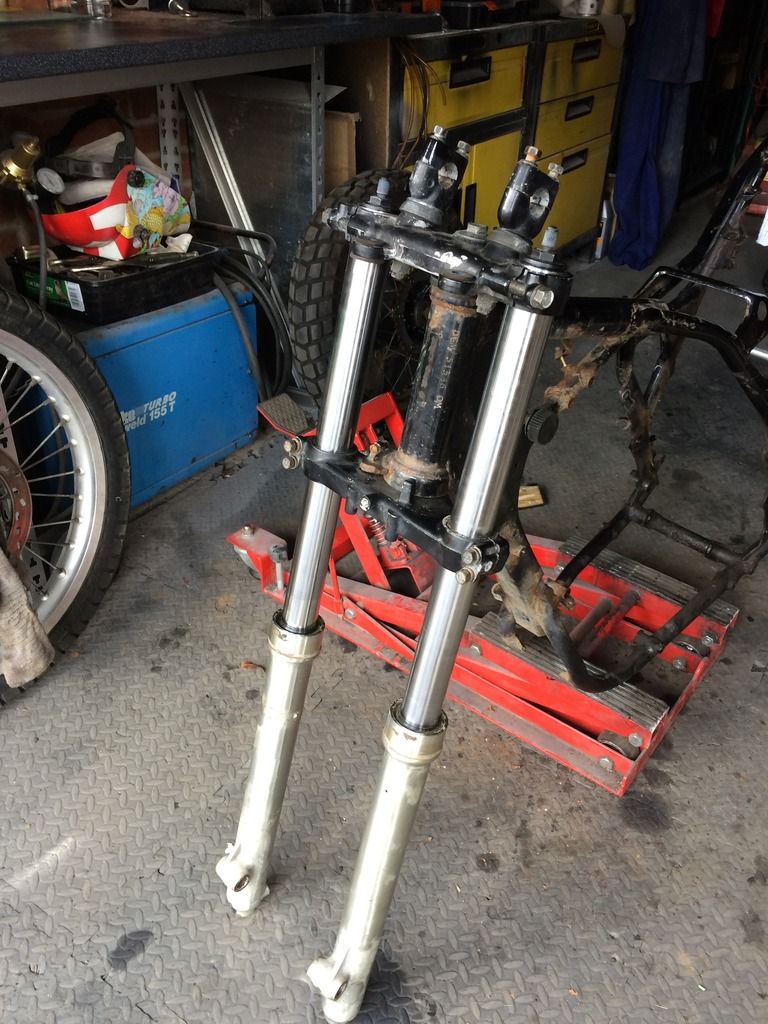 Green-Go (was called Clive's Latest) If you were going to change the fork seals, then after removing the piston, take the dust seal and little Spring 'washer' off the top of the outer fork tube, and keep sliding the inner tube apart, with a little bit of force, until the fork seal comes out. In the good old fashioned words of mr Haynes, re-assembly is the reverse of the above. |
|
|
|
« Last Edit: June 25, 2016, 02:59:33 PM by Clive »
|
Logged
|
|
|
|
|


