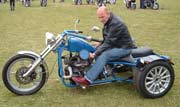
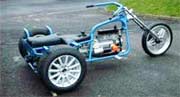
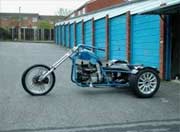
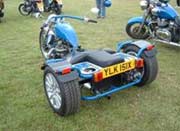
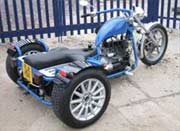
BLUE JOB
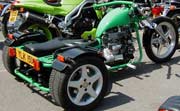
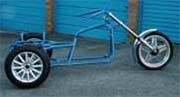
This is my trike. A lot of you will recognise it as Mr Manky’s old green ‘un.
This project started almost three years ago. I met Andy through my brother-in-law Simon, who was in talks with him about building a trike.
It was then that Andy said he fancied a change and was gonna build himself a simpler and prettier trike. At this point my life as a Triker started. I told Andy I would be interested in his green machine if the price was within my budget. Andy wanted to use all the running gear off the green ‘un so we agreed a price for the frame and few other bits ’n’ bobs that weren’t of any use for his new build.
I started looking at E-bay to get a few bargains. The first was a complete front end -alloy yokes, fork legs, wheel, discs and calipers -all for £24. I started going to local auto jumbles & soon picked up a complete set of 15inch alloy wheels for £20. My son and I were at a local scrap-yard, getting some bits for his car, when we spotted a complete Reliant sat on top of the portacabin office, being used as an advert for the business. So we asked how much they would take for it. The owner said “give me £30 and I will deliver it to your house tomorrow”!!! These are just a few of my bargains. It just proves you can build a good looking trike on a tight budget if you’re willing to wait.
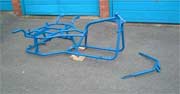
First I stripped the trike, so I could have it powder-coated and make a few changes to the frame -some extra gussets around the headstock and some thicker plate at the bottom of the top tube. Although there was no evidence of any stress put on the frame over the past four or five years that Andy had been riding it, it was just better to be safe than sorry!
The plan was to wait until Simon’s trike was finished before I started any work on mine, but that went out the window when I agreed to let Andy build his trike in my garage as well. I didn’t realise that Andy’s intentions were to turn my garage into his H.Q for Manky Monkey Motors, building five trikes, finishing ‘Flaps’, as well as all the other projects that Andy gets involved in too!
Don’t worry Andy, I’m not complaining -I value the knowledge that I’ve gained over the last three years working with one of the best trike builders around and hopefully I can call myself a trike builder as well now.
Let’s get back to my “Bl** Job“. I decided that I would rent a lock up, so I could get mine finished for the Shepton Mallet show at the end of April. This gave me about three weeks to get it completed. I collected the frame from the powder-coaters on the 19th April.
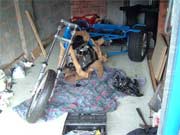
DAY ONE: Set about getting it on three wheels!
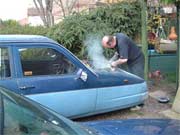
DAY TWO: Engine taken out of the ‘donor’. Finally got to bed at 1am after cleaning the engine up ready for the next days work!
DAY THREE: Seat and radiator fitted.
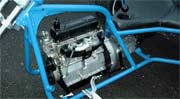
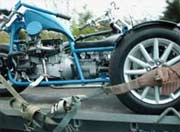
DAY FOUR: Covered frame with carpet underlay before fitting the engine in to protect the powder-coating.
DAY FIVE: Alternator; starter motor, carb, foot pegs, brake and clutch pedals fitted.
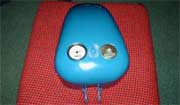
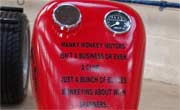
DAY SIX: I painted the tank and battery boxes and put rear fenders on. I also painted a display tank for the Manky stand at Shepton.
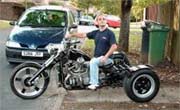
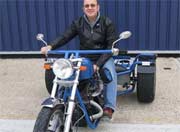
DAY SEVEN: Tank, battery & lights fitted, then a good polish!
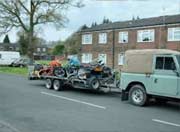
I ran out of time due to other commitments, so was unable to do the wiring. The trike had to go on the trailer with the other ‘Manky” trikes.
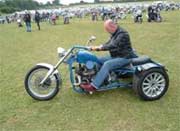
Shepton Mallet was an excellent show and we’re already looking forward to next year’s.
I completed the wiring, (never again!!), by the end of May & the M.O.T was done shortly after.
Since then I’ve covered over 1500 miles and have enjoyed every minute of it.
-Nigel.